Workouts on a Rowing Machine: From Steady State to High Intensity
Why Rowing Machine Workouts Belong in Every Fitness Routine
Workouts on a rowing machine are one of the most efficient ways to build cardio fitness, burn calories, and strengthen your entire body — all in a single, low-impact session.
Here’s a quick look at the most effective rowing workouts you can do, no matter your fitness level:
| Workout Type | Duration | Best For |
|---|---|---|
| Easy Steady-State Row | 20-30 min | Beginners, active recovery, aerobic base |
| Zone 2 Low-Intensity Row | 25 min | Fat burning, technique, mitochondrial fitness |
| HIIT Intervals (1 min on / 1 min off) | 20 min | Calorie burn, cardiovascular conditioning |
| Pyramid Intervals | 20-25 min | Endurance, lactate threshold |
| Race Simulation Row | 10-15 min | Advanced athletes, HYROX prep |
| Row + Strength Combo | 30-45 min | Full-body conditioning, muscle building |
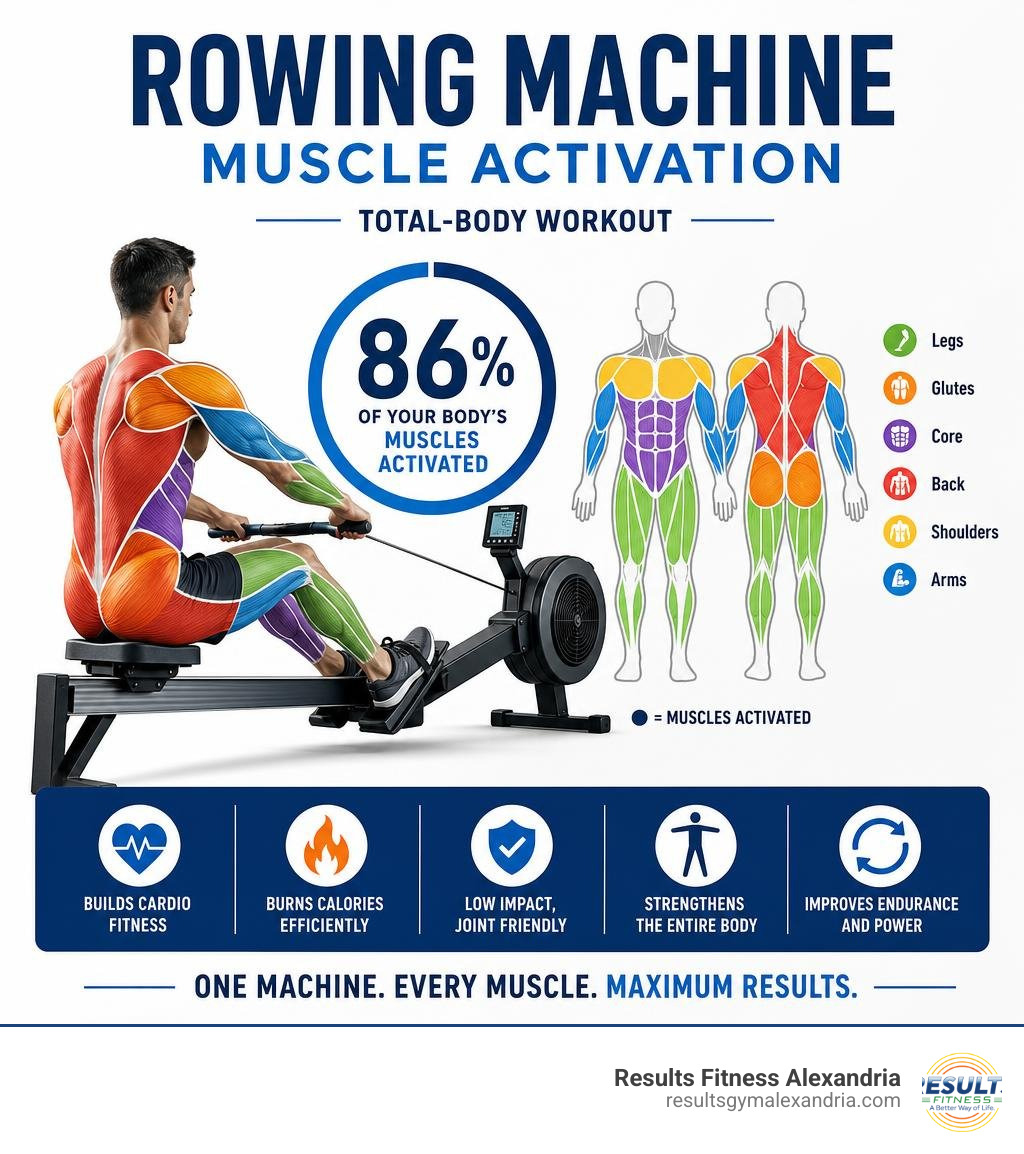
Rowing is unique because it engages roughly 86% of your body’s muscles in a single stroke — legs, glutes, core, back, shoulders, and arms all working together. Unlike running, it puts almost no stress on your joints, making it a smart choice whether you’re just starting out or training for a race.
Yet most people either skip the rowing machine entirely or only scratch the surface of what it can do. This guide changes that.
I’m Jennifer Rapchak, Fitness Director at Results Fitness Alexandria and an ACE-certified personal trainer with over 14 years of experience designing strength, HIIT, and cardio programs — including workouts on a rowing machine for clients at every fitness level. In the sections ahead, I’ll walk you through everything from proper setup and technique to beginner sessions, high-intensity intervals, and a full 4-week training plan.
Must-know workouts on a rowing machine terms:
The Benefits of Rowing Machine Workouts
When we talk about efficiency in the gym, nothing quite matches the indoor rower. Whether your goal is fat loss, muscle toning, or building an athletic aerobic base, workouts on a rowing machine deliver on every front.
First, let’s look at muscle activation. While a stationary bike targets your legs and a treadmill focuses on your lower body, rowing engages up to 86 percent of your muscles simultaneously. It activates nine distinct muscle groups and utilizes 85 percent of the body’s musculature. Every single stroke requires a powerful leg drive (quads, glutes, and calves), a strong core hinge, and a smooth pull from your upper back, shoulders, and arms.
Second, rowing is incredibly joint-friendly. Because your feet remain in contact with the footplates and your body weight is supported by the sliding seat, there is zero landing impact. This makes it an ideal cross-training tool for runners looking to rest their knees, or anyone returning to fitness after an injury. In fact, research shows that rowing can help those with arthritis gain muscular strength and endurance while minimizing joint pain.
Finally, the cardiovascular and metabolic conditioning is unmatched. For high-intensity training, rowing is a powerhouse. In studies of elite open-class rowers, energy expenditure has reached an incredible 15.6 to 49.8 kcal per minute during maximal exertion. Even at a moderate, steady-state pace, rowing promotes excellent metabolic health. Science shows that the maximal fat oxidation (MFO) rates during rowing average about 0.40 g·min⁻¹. While a treadmill can elicit slightly higher peak fat oxidation due to its weight-bearing nature, rowing offers a unique balance of high cardiovascular strain and muscular endurance training.
Learn more about the incredible benefits of rowing to see why this machine is a staple in our Alexandria training facility.
Setting Up Your Rowing Machine and Mastering Technique
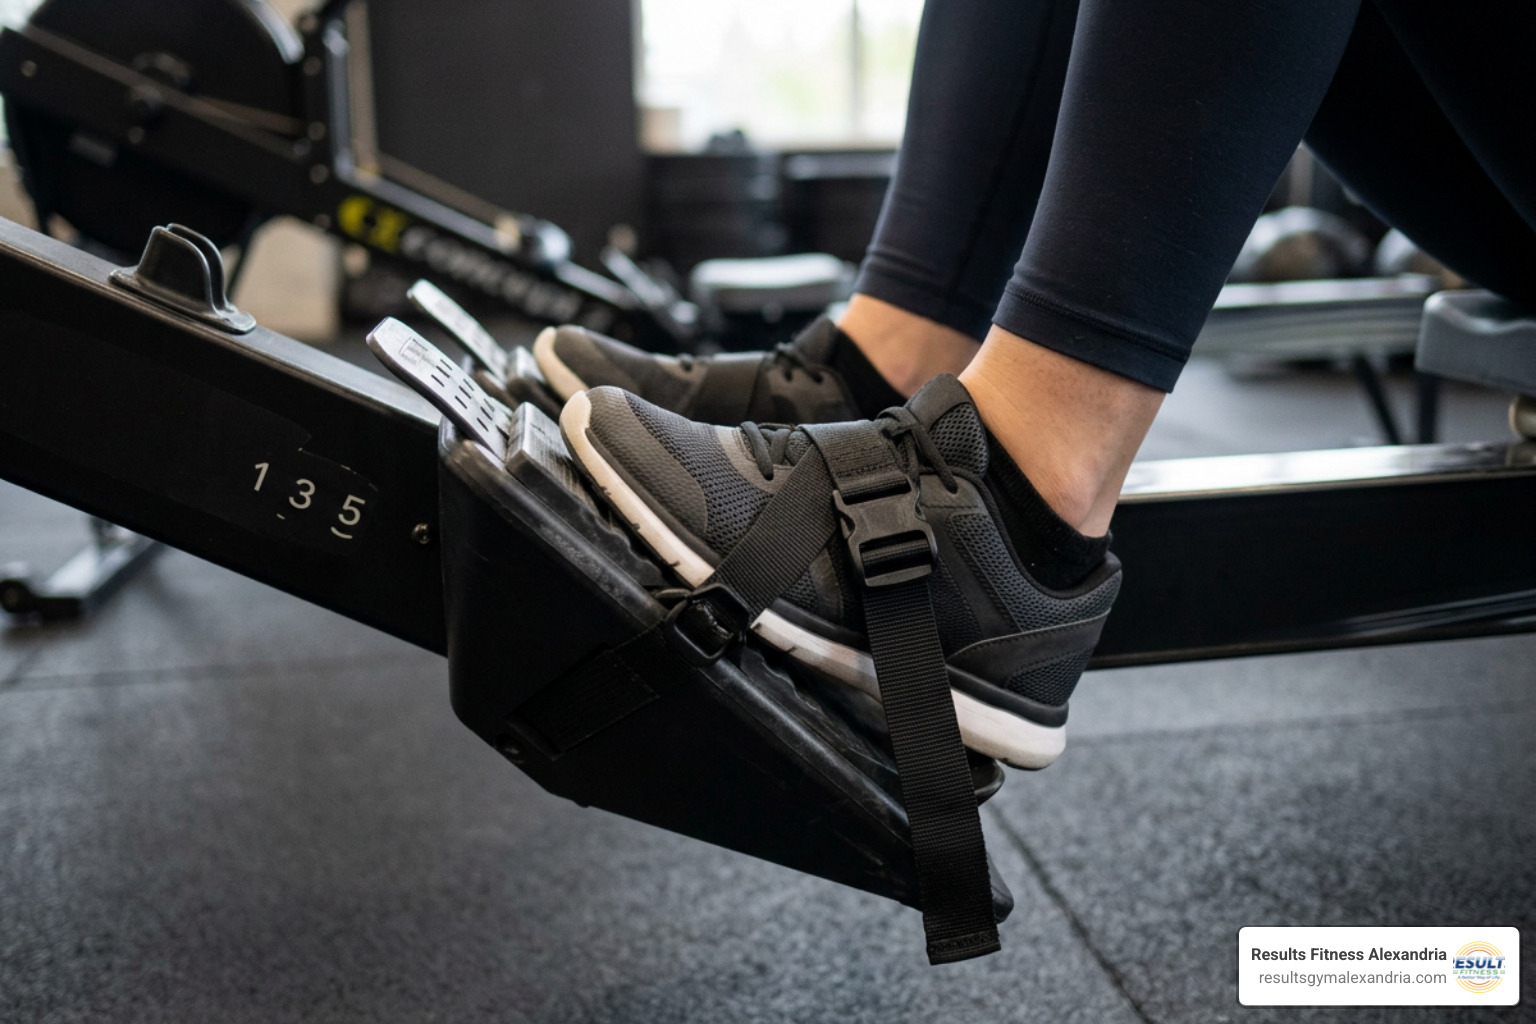
Before you pull the handle for the first time, you need to set up the machine correctly. A poor setup leads to poor form, which wastes energy and increases your risk of lower back strain.
1. Adjusting the Foot Straps
Place your feet in the stretchers so that the strap crosses over the widest part of your foot (the ball of your foot, not your toes). This allows your heel to rise naturally at the front of the stroke while keeping you securely connected to the footplate.
2. Choosing the Right Damper Setting
The lever on the side of the flywheel housing is the damper, not a resistance dial. Setting the damper to 10 does not make your workout “better”—it simply simulates a heavy, sluggish boat. For most workouts, keep the damper between 3 and 5. This range provides an optimal drag factor (typically 110 to 140 on a Concept2 monitor), allowing you to focus on quick, explosive leg power rather than dragging a heavy load.
3. The Four Phases of the Stroke
To maximize your power and protect your back, you must master the four phases of the rowing stroke:
- The Catch: This is the starting position. Sit tall with your arms straight, shoulders relaxed and loose, and your torso tilted slightly forward at a “one o’clock” angle. Your shins should be vertical, and your core must be braced.
- The Drive: The drive is all about sequencing: Legs, Back, Arms. Drive through your heels by extending your legs first. Once your legs are almost straight, hinge your torso backward to an “eleven o’clock” angle, and finally, pull the handle to your sternum. The drive phase accounts for 60% of the overall effort, with the hip hinge and catch contributing 20% each.
- The Finish: At the finish, your legs are fully extended, your core is tight, and the handle is held lightly at your lower ribs. Your shoulders should be down, and your wrists should be flat.
- The Recovery: The recovery is the exact reverse of the drive: Arms, Back, Legs. Extend your arms first. Once the handle passes your knees, hinge your torso forward from the hips. Only then should you bend your knees and slide forward to the catch. Crucially, the recovery phase should take twice as long as the drive phase to allow for active recovery and optimal stroke efficiency.
Check out our ultimate rowing form checklist to make sure you are avoiding common errors like rounding your lower back or pulling with your arms too early.
Effective Workouts on a Rowing Machine for All Levels
To get the most out of your training, you need to understand how to track your progress on the monitor. The most important metrics are your stroke rate (measured in strokes per minute, or SPM) and your split time (the time it takes to row 500 meters, shown as /500m).
By varying these metrics, we can target different energy systems, from building a strong aerobic base in Zone 2 to pushing your anaerobic threshold in high-intensity intervals.

Beginner Workouts on a Rowing Machine
If you are new to rowing, your primary focus should be on building a steady rhythm and maintaining perfect form. We recommend starting with low-intensity, steady-state (LISS) workouts. These sessions build mitochondrial efficiency and aerobic capacity without leaving you completely exhausted.
An excellent starting point is a 25-minute conversational-pace row. Keep your stroke rate low—around 18 to 20 SPM—and focus on a relaxed handle grip and a slow, controlled recovery phase.
- Read our complete beginner guide to rowing for step-by-step guidance.
- Try this easy 25-minute home rowing workout to practice your pacing, or listen to May 13: The 25 Min Low Intensity Rowing Machine Workout YOU SHOULD BE DOING! – RowAlong – Indoor Rowing Workouts | Acast for a guided, technique-focused session.
- If you find yourself struggling to stay motivated on a slow day, try Not Feeling It? Row Anyway 🚣 25 Minute Follow Along Rowing Workout – RowAlong – Indoor Rowing Workouts | Acast to build consistency.
High-Intensity Interval Workouts on a Rowing Machine
Once you have mastered the basic technique, you can use HIIT protocols to maximize calorie burn and challenge your cardiovascular limits. Because rowing is low-impact, it is an incredibly safe tool for high-intensity sprint intervals.
Try this 20-Minute HIIT Rowing Protocol:
- Warm-Up: 3 minutes of easy rowing, gradually increasing your stroke rate from 18 to 22 SPM.
- Work Intervals: Perform 8 rounds of 1 minute at high intensity (85–90% effort, 26–28 SPM) followed by 1 minute of active recovery (very light rowing, under 18 SPM).
- Cool-Down: 3 minutes of gentle rowing and light stretching.
For beginners, a 1:3 work-to-rest ratio (such as 30 seconds of hard effort followed by 90 seconds of rest) is a great way to start. As your fitness improves, you can transition to a 1:1 ratio. To explore more interval styles, check out Row Your Heart Out with These 20-Minute Workouts.
Advanced Endurance and Race Simulation Sessions
For seasoned athletes or those preparing for endurance events like HYROX, pacing strategy and sustained power output are everything. Advanced rowers must learn to maintain a consistent 500m split time over longer distances without letting their stroke rate spike too high.
A classic advanced endurance session is the 30-Minute Steady Power Row. The goal is to hold a steady pace at 22–24 SPM for the entire duration. Your 500m split times should not vary by more than 2 to 3 seconds from the first minute to the last. This builds massive aerobic capacity and teaches your body to utilize oxygen efficiently under prolonged physical stress. If you want to mix up your endurance training, explore How to Rowing Machine Workout 5 Effective Methods for advanced programming ideas.
Combining Rowing with Strength Training
Rowing is a fantastic tool to integrate into metabolic conditioning (MetCon) circuits. Because it targets the posterior chain (glutes, hamstrings, and back), it pairs perfectly with pushing movements or core-focused exercises.
Try this Row and Strength MetCon Circuit:
- Row 500 meters at a moderate pace (22–24 SPM).
- Perform 15 kettlebell swings.
- Perform 10 push-ups.
- Perform a 45-second plank.
- Rest for 90 seconds. Repeat for 3 to 4 rounds.
This combination keeps your heart rate elevated while building muscular endurance across different movement patterns. Discover our ultimate full-body rowing routine to see how we blend rowing and strength training for maximum results. For a shorter, high-intensity finisher, you can also try Row Your Way to Fitness in a 10-Minute Rowing Machine Workout.
How to Structure a 4-Week Rowing Training Plan
To see real progress in your endurance, power, and split times, you need a structured approach. This periodized 4-week training plan is designed to build your aerobic base, raise your lactate threshold, and prepare you for high-intensity race simulation.
For the best results, aim for 2 to 3 rowing sessions per week, allowing at least one day of rest or strength training between workouts.
- Week 1: Technique Foundation & Aerobic Base
- Focus: Mastering the stroke sequence and building consistency.
- Workout A: 25-minute steady-state row at 18–20 SPM. Keep your heart rate in Zone 2 (conversational pace).
- Workout B: 5,000-meter row. Focus on keeping your arms straight during the first half of the drive. Try Row Along: 22 Mins Easy Rowing Workout + How I Quit Being Lazy – RowAlong – Indoor Rowing Workouts | Acast for a perfect 5K guide.
- Week 2: Volume Build & Aerobic Capacity
- Focus: Increasing total rowing time and introducing light intervals.
- Workout A: 30-minute steady-state row at 20 SPM.
- Workout B: 3 rounds of 8 minutes at moderate intensity (22 SPM) with 2 minutes of active rest between rounds.
- Week 3: Pace Development & Lactate Threshold
- Focus: Teaching your body to clear lactic acid at higher intensities.
- Workout A: Pyramid Intervals. Row 1 min, 2 min, 3 min, 2 min, 1 min at high intensity (24–26 SPM) with equal rest periods.
- Workout B: 20-minute tempo row. Hold your target 500m race split pace at 24 SPM.
- Week 4: Race Simulation & Peak Performance
- Focus: Testing your speed and transition capacity.
- Workout A: 1,000-meter time trial. Warm up for 5 minutes, then row 1,000 meters as fast as possible while maintaining a steady stroke rate (26–28 SPM).
- Workout B: Row + Strength transition practice. Row 500m, immediately perform 15 burpees, and repeat for 3 rounds.
Follow this structured 4-week training plan to track your progress and see measurable improvements in your cardiorespiratory fitness.
Comparing Rowing to Other Cardio Machines
If you only have limited time for cardio, which machine should you choose? Let’s compare how the rowing machine stacks up against other popular gym equipment:
| Cardio Machine | Primary Muscle Engagement | Joint Impact | Posterior Chain Focus | Energy Expenditure |
|---|---|---|---|---|
| Rowing Machine | Full-body (86% muscle activation: legs, core, back, arms) | Very Low | High (Excellent for posture and back strength) | High (Up to 15.6–49.8 kcal/min for elite athletes) |
| Treadmill | Lower body (quads, hamstrings, calves) | High | Medium | Very High (Slightly higher peak fat oxidation) |
| Stationary Bike | Lower body (quads, glutes) | Low | Low | Medium to High |
| Elliptical | Full body (with handles), but lower resistance | Low | Low | Medium |
While the treadmill is an excellent tool for pure cardiovascular conditioning and has a slightly higher maximal fat oxidation rate, it places significant stress on your knees, ankles, and hips. Stationary bikes are great for lower-body power, but they completely ignore your upper body and core.
The rowing machine is the only option that offers a true full-body workout, actively strengthening your posterior chain (which counteracts the effects of sitting at a desk all day) while remaining entirely low-impact.
Frequently Asked Questions about Rowing Workouts
How often should I do rowing workouts?
For most people, rowing 2 to 4 times per week is the sweet spot. This frequency provides excellent cardiovascular benefits and muscle engagement while allowing your lower back and posterior chain adequate time to recover. If you are using rowing as active recovery, low-intensity 20-minute sessions can be done more frequently.
Is rowing better than running for weight loss?
Both are fantastic for burning calories. Running can support slightly higher maximal fat oxidation rates because it is a weight-bearing exercise. However, rowing engages far more muscle mass (86% vs. lower body only), which helps build lean muscle tissue and boost your resting metabolism. Plus, rowing is much easier on the joints, making it a more sustainable long-term option for many people.
What damper setting should I use?
We recommend keeping the damper setting between 3 and 5. This range provides a realistic level of resistance that mimics the feel of a clean boat on the water. Setting the damper to 10 creates too much drag, which slows down your stroke, ruins your form, and puts unnecessary strain on your lower back. Focus on driving harder with your legs to increase resistance, not sliding the damper up.
Conclusion
Whether you are looking to build a rock-solid aerobic base with steady-state sessions or torch calories with high-intensity intervals, workouts on a rowing machine are an absolute game-changer for your fitness. By mastering the simple “legs, back, arms” sequence and staying consistent with your training, you will build full-body strength, improve your posture, and boost your cardiovascular endurance.
At Results Fitness Alexandria, we are dedicated to helping you move better, feel stronger, and reach your personal goals. Our expert trainers are always on hand to help you perfect your rowing technique, design custom programs, and keep you motivated every step of the way.
Ready to experience the power of rowing for yourself? Come visit our premium facility in Alexandria, Virginia, and take advantage of our free 1-day pass to try our top-tier cardio equipment, strength training amenities, and group classes.
Explore our premium cardio amenities and start your fitness journey today!