
How to Build Muscle and Burn Fat with Rowing Circuits
Understanding Rowing Circuit Training Workouts
At its core, a rowing circuit training workout pairs indoor rowing intervals on an ergometer with targeted off-machine strength, core, or bodyweight stations. Instead of sitting on a bike or running on a treadmill for 45 minutes of monotonous steady-state cardio, you alternate between explosive rowing efforts and resistance exercises. This blending of aerobic conditioning and load-bearing strength is often referred to as metabolic resistance training.
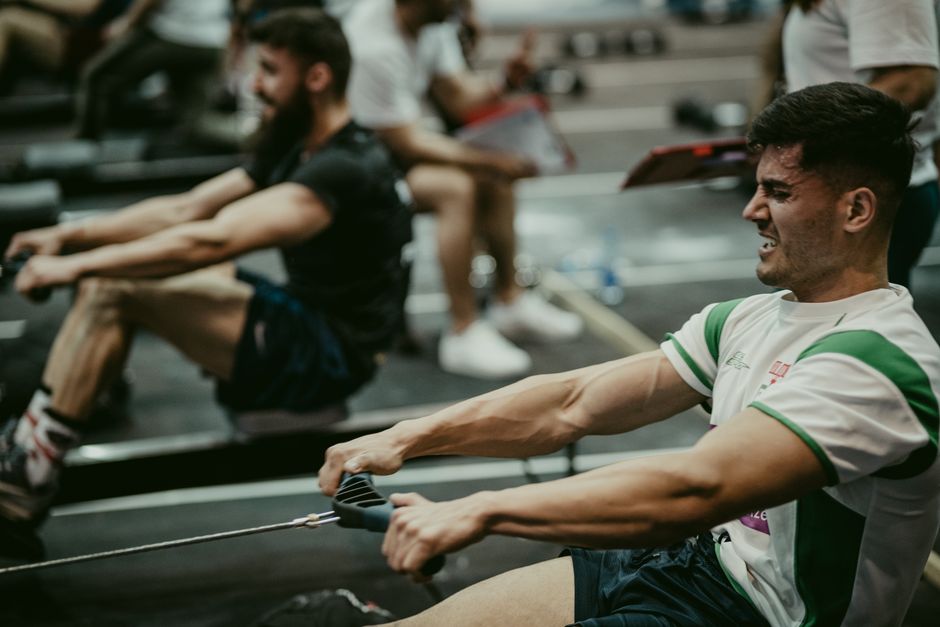
What makes the rowing machine (or “erg”) so uniquely effective in a circuit is its muscle recruitment. A proper rowing stroke utilizes roughly 86% of your body’s muscle mass across major muscle groups, including your quadriceps, hamstrings, glutes, lats, core, and shoulders. When you integrate the rower into a circuit, you turn cardio into a total-body strength-building experience.
When deciding between traditional cardio and resistance work, many gym-goers wonder about Cardio vs Strength Training for Weight Loss Which Is Better. Rowing circuits combine both modalities into one seamless session, boosting cardiovascular endurance and building lean muscle simultaneously. As highlighted in guides on structured Circuit Training, organizing your training into multi-station blocks keeps your heart rate elevated while giving local muscle groups short windows to rest and recover.
The Science Behind Rowing Circuits for Fat Loss and Muscle Building
The secret behind why rowing circuit training workouts burn fat so rapidly lies in high-intensity interval mechanics and EPOC (Excess Post-Exercise Oxygen Consumption). When you alternate hard rowing sprints with compound strength exercises, your body incurs an oxygen debt. To restore metabolic balance after your session, your body burns extra calories for hours—a phenomenon often called the “afterburn effect.”
Beyond calorie burn, rowing circuits support total body hypertrophy and posterior chain development. The rowing stroke mimics fundamental strength movements: the drive phase acts as an explosive leg press and deadlift, while the finish mirrors a chest-supported row.
Because rowing is non-weight-bearing, it offers a remarkably low joint impact. High-impact movements like jumping or running subject your joints to massive compressive stress—in fact, landing forces during a vertical jump can reach 6.9 to 10 times an athlete’s body weight. Rowing delivers maximum cardiovascular intensity without that brutal wear and tear on your knees and hips.
To maximize these adaptations, controlling your work-to-rest ratio is key. By pairing a 1:1 or 2:1 work-to-rest ratio with compound lifts, you learn about Maximizing Results Integrating Strength Training Into Your Cardio Routine without causing excessive central nervous system fatigue.
Master the Mechanics: Integrating Proper Rowing Technique Into Circuits
To get the most out of every sprint and protect your lower back, mastering proper stroke mechanics is mandatory before cranking up the workout intensity. The rowing stroke follows a precise order: Catch, Drive, Finish, and Recovery.

Here is how to execute each phase correctly:
- The Catch: Sit tall with your torso leaning forward at a slight 1 o’clock angle. Keep your knees bent, shins vertical, arms straight, and grip relaxed.
- The Drive: Initiate the movement by pressing forcefully through your heels. Extend your legs first, hinge back at the hips to a 10 o’clock position, and finally pull the handle to your sternum. Remember: Legs, Core, Arms.
- The Finish: Legs fully extended, shoulders down, handle resting lightly against your lower ribs.
- The Recovery: Reverse the motion precisely. Extend your arms first, hinge your torso forward from the hips, and then bend your knees to slide the seat back to the catch. Maintain a 2:1 temporal ratio—your recovery phase should take twice as long as your drive phase.
Avoid common pitfalls like cranking the damper setting to 10. For metabolic circuits and endurance performance, set the damper between 3 and 5. This calibrated drag factor (typically 110–140 on Concept2 machines) rewards smooth power production rather than dragging a heavy load. Aim for a target stroke rate of 24–28 strokes per minute (spm) during circuit work. Pushing past 30 spm usually leads to rushed recoveries and incomplete leg drives. Check out The Ultimate Rowing Form Checklist Avoid These Common Mistakes for a full breakdown of form cues.
5 Essential Rowing Circuit Training Workouts for Every Fitness Level
Whether you are stepping onto the gym floor for the first time or training for competitive events, scaling your workouts ensures safety and continuous physical adaptation.
Beginner Rowing Circuit Training Workouts for Foundational Strength
If you are new to the ergometer, start with a straightforward circuit built on fundamental functional movement patterns. This routine uses a strict 1:1 work-to-rest ratio, allowing you to focus on form without accumulating extreme exhaustion.
Review The Complete Beginner Guide to Rowing Machine Workouts before starting this 4-round circuit:
- Station 1: 200m Row Sprint (Maintain 24–26 spm)
- Station 2: Bodyweight Squats x 15 reps
- Station 3: Incline Push-Ups (hands on bench or rower rail) x 10–12 reps
- Station 4: Forearm Plank Hold x 30 seconds
- Rest 60 seconds after each complete round. Repeat for 4 total rounds.
Intermediate Kettlebell and Dumbbell Rowing Circuit Routines
Once you have established a solid technique baseline, adding external weights like kettlebells and dumbbells elevates the cardiovascular demand and challenges your muscular endurance.
Try this intermediate 4-round routine:
- Station 1: 500m Row Interval (Moderate-hard pace, target under 2:00/500m split)
- Station 2: Kettlebell Swings x 15–20 reps
- Station 3: Dumbbell Renegade Rows x 12 total reps (6 per side)
- Station 4: Dumbbell Thrusters x 10–12 reps
- Rest 60 to 90 seconds between rounds. Repeat for 4 complete rounds.
For additional exercise variations, explore how to Row Your Way to Fitness With This Ultimate Full Body Routine.
Advanced 30-30-for-30 System and HYROX Race Prep Circuits
Advanced athletes demand protocols that test threshold management under deep physical fatigue. Two gold-standard frameworks excel here: the 30-30-for-30 system and HYROX race preparation circuits.
The 30-30-for-30 framework, popularized by strength expert Dan John, caps the session at 30 minutes total, consisting of 30 seconds of work followed by 30 seconds of rest. Over 30 minutes, you log exactly 15 minutes of active work time, making it an optimal 1:1 ratio for managing fatigue while delivering a high volume of work.
For those prepping for functional fitness races, review this 4-Week HYROX® Rowing Training Plan. A killer race-prep circuit includes:
- 1000m Row at target race pace (24–28 spm)
- 20 Burpee Broad Jumps
- 500m Row Sprint
- 100m Sled Push or Heavy Goblet Lunge
- Rest 3 minutes; repeat for 2–3 total blocks.
To dig deeper into structural guidelines, read more on Strength Training Circuits for Rowing – Rowing Stronger.
High-Intensity Core and Cardio Rowing Circuit Training Workouts
You can also use the rowing machine itself as a core training tool by leveraging the sliding seat.
Try this creative core and cardio ladder:
- Station 1: Descending Sprint Ladder on Rower (Round 1: 500m, Round 2: 400m, Round 3: 300m, Round 4: 200m, Round 5: 100m)
- Station 2: Sliding Seat Plank Knee Tucks or Bear Crunches x 15 reps (hands on floor, feet on the sliding rower seat)
- Station 3: Medicine Ball Russian Twists x 20 total reps
- Station 4: Forearm Plank Hold x 45–60 seconds
Workout details like these can be adapted directly from this Core + Cardio Circuit with the Rower.
Common Circuit Mistakes and How to Avoid Injury
While rowing circuit training workouts are incredibly productive, poor session design can quickly lead to overuse injuries or premature burnout.
Here are four common design errors and how to fix them:
- Overusing Stroke Muscles Off the Rower: Rowing heavily taxes your pulling muscles (lats, biceps, rear delts) and posterior chain (hamstrings, lower back). Pairing rower sprints directly with pull-ups, barbell rows, or heavy deadlifts causes acute back strain and fatigue. Fix: Pair rowing with pushing movements (push-ups, overhead presses) and multi-planar core exercises.
- High-Rep Plyometrics Under Fatigue: Performing explosive box jumps or high-rep jump squats late in a grueling circuit degrades landing mechanics. With vertical jump landings placing up to 10 times bodyweight compression forces on knee joints, fatiguing jumps raise your injury risk. Fix: Keep plyometrics low-volume (3–5 reps) and perform them early when fresh.
- Ignoring Multi-Planar Movement: Rowing happens entirely in the sagittal plane (forward and backward). Doing only sagittal strength exercises creates movement imbalances. Fix: Integrate lateral lunges, Pallof presses, and rotational medicine ball work.
- Skipping Practice Rounds: Jumping straight into a timed, high-intensity circuit ruins technique. Fix: Always perform an “instructional round” with light resistance to check movement pathways before starting the clock.
How to Program Progressive Overload in Rowing Circuits
Circuit training is not just about making yourself sweaty and tired—it requires deliberate structure to drive progress over time. You must apply progressive overload systematically.
Instead of just adding heavier weights (which can compromise form during high-cardio circuits), try these methods:
- Increase Total Rounds: Move from 3 rounds to 4 rounds while keeping interval times identical.
- Extend Active Work Intervals: Shift work-to-rest windows from 30s work / 30s rest up to 40s work / 20s rest.
- Control Eccentric Tempo: Keep weights light, but lower the resistance over a prolonged 3-to-4-second eccentric phase (e.g., 4-second descent on goblet squats).
- Shorten Transition Rest: Reduce recovery windows between stations by 5 to 10 seconds every fortnight.
Read more about structuring long-term adaptations in our guide on The Power of Progressive Overload How to Keep Getting Stronger.
Comparing Rowing Circuit Formats for Maximum Efficiency
Selecting the right circuit structure depends on your specific performance goals.
| Circuit System | Work/Rest Structure | Primary Fitness Goal | Fatigue Management |
|---|---|---|---|
| AMRAP (As Many Rounds As Possible) | Fixed time limit (e.g., 15 mins); continuous work with minimal rest | Cardiovascular endurance & mental toughness | Moderate to Poor (risk of technique breakdown) |
| EMOM (Every Minute On the Minute) | Perform task within 60s; remaining time is rest | Pacing discipline & explosive power | Excellent (built-in rest rewards speed) |
| 30-30-for-30 | 30s max work / 30s strict rest for 30 minutes total | Aerobic capacity & hypertrophy base | Superior (1:1 ratio maintains technique) |
How to Program Rowing Circuits Into Your Weekly Routine
To avoid overtraining your lower back and shoulders, rowing circuit training workouts should be programmed thoughtfully across your training week.
For most fitness enthusiasts, a frequency of 2 to 3 days per week (on non-consecutive days) strikes the perfect balance between high training stimulus and full recovery. During a year-round training cycle, circuits belong primarily in your General Preparation Block—a phase where building base aerobic capacity and functional movement volume takes priority before moving into heavier strength phases.
Complement your conditioning by checking out Workouts on a Rowing Machine From Steady State to High Intensity. To support your central nervous system between sessions, prioritize your rest with our guide on Post Workout Recovery.
Frequently Asked Questions About Rowing Circuit Training Workouts
How many times a week should I do rowing circuit workouts?
We recommend scheduling 2 to 3 rowing circuit workouts per week, making sure to place at least one rest day or light recovery session between workouts. Because rowing heavily recruits your lower back and hamstrings, doing intense circuits four or five days in a row can lead to cumulative posterior chain strain and fatigue.
What damper setting should I use during rowing circuits?
Set your damper between 3 and 5 (achieving a drag factor between 110 and 140). A common misconception is that a higher damper setting (8 to 10) yields a harder, better workout. In reality, heavy damper settings simulate pulling a heavy barge, which quickly exhausts your arms and lower back before you get an optimal cardiovascular workout. A moderate setting of 3 to 5 rewards proper leg drive and fluid pacing.
Can I do rowing circuit workouts at home with minimal equipment?
Yes! If you have a home ergometer, you can complete powerful circuits using just your body weight—combining rower sprints with push-ups, air squats, lunges, and floor planks. If you have limited space, you can also incorporate resistance bands or light kettlebells to replace dumbbell movements seamlessly.
Conclusion
Combining rowing intervals with functional strength training offers an unbeatable mix for fat loss, muscle building, and total-body conditioning. By targeting nearly 86% of your muscle mass with zero joint impact, rowing circuit training workouts provide a safe, effective path to reaching your fitness goals.
Consistency, proper stroke mechanics, and systematic progressive overload are your keys to long-term success. Track your split times, keep your stroke rate locked between 24 and 28 spm, and balance your work-to-rest windows carefully.
If you are ready to elevate your routines, visit us at Results Fitness in Alexandria, Virginia. Work directly with our personal trainers, experience our top-tier functional training equipment, and see how our community can support your journey. Claim your free 1-day pass today to check out our Cardio Equipment at Results Fitness and kickstart your functional fitness routine!